Resistance bands aren’t just backup equipment for when you can’t make it to the gym. Used right, they can build legit strength and tone your legs without putting unnecessary stress on your joints. Whether you’re just starting out or you’re looking for a smarter way to train legs without always loading up heavy weights, resistance bands are one of the most underrated tools out there. In this post, I’ll walk you through why bands actually work, how to pick the right ones, and the best resistance band exercises for toning legs and boosting lower body strength.
Why Resistance Bands Work for Leg Training
People sleep on resistance bands because they look simple. But the truth is, they’re joint-friendly, which is a big win if you’ve got cranky knees or tight hips. Plus, bands make it easy to control the tempo of your movements, which can seriously improve your form and muscle activation.
Another big plus? Versatility. You can train anywhere. Your living room, a hotel room, the park, without needing racks or machines. And with some creativity, bands can challenge even advanced lifters.
Choosing the Right Resistance Bands
Not all bands are created equal, and picking the wrong type can hold you back or make your workouts way harder than they need to be.
- Loop bands (the flat, circular ones) are great for lower-body exercises like squats, glute bridges, and side steps.
- Long resistance bands with handles or without can be better for compound movements like deadlifts or assisted pull-ups.
- Figure-8 bands are more niche but can be useful for certain isolation moves.
As for resistance levels, most sets come with light, medium, and heavy options. If you’re just getting started, go medium. If you’re aiming for strength-focused sets with low reps, heavier bands will push you more. Don’t stick with the same band forever. As you get stronger, level up.
Best Resistance Band Exercises for Toning Legs
These moves aren’t complicated, but they work. You’ll hit quads, glutes, hamstrings, and even the stabilizers that often get ignored.
1. Banded Squats
Target: Quads, glutes, hips
How: Place a loop band above your knees. Squat down, pushing your knees slightly out against the band.
2. Glute Bridges with Band
Target: Glutes, hamstrings
How: Lie on your back, band above your knees, feet flat. Drive your hips up and squeeze your glutes at the top.
3. Lateral Band Walks
Target: Glute medius, outer thighs
How: Band above the knees or at the ankles. Step side to side in a low squat position.
4. Standing Kickbacks
Target: Glutes, hamstrings
How: Anchor the band and loop it around one ankle. Kick that leg back with control.
5. Resistance Band Deadlifts
Target: Hamstrings, glutes, lower back
How: Stand on a long band, holding each end. Hinge at the hips and lift like a normal deadlift.
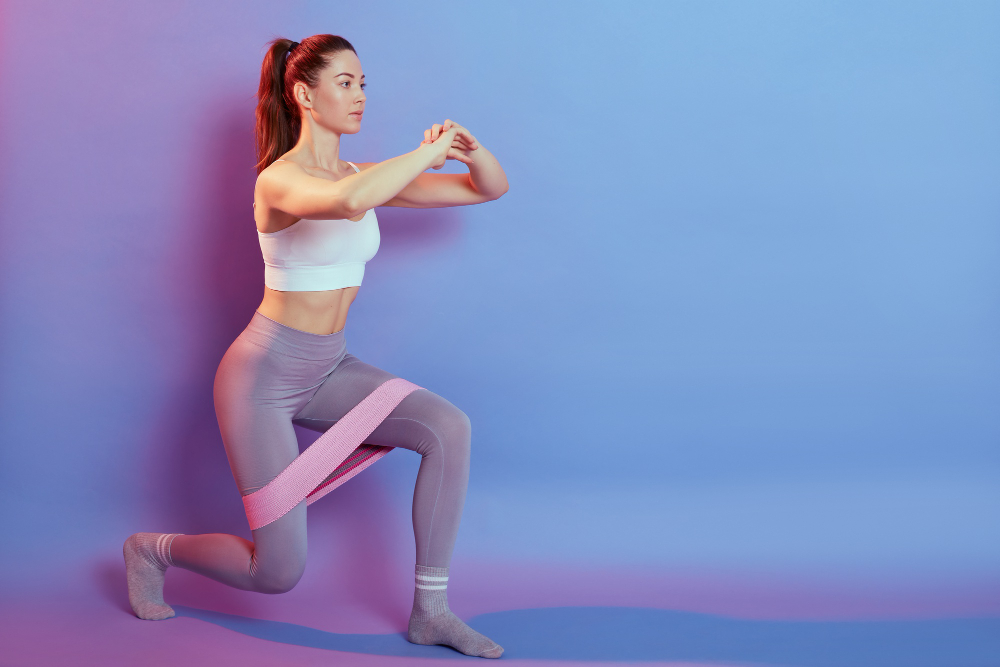
6. Step-Out Lunges with Band
Target: Quads, glutes, balance
How: Band around your thighs. Step out into a side lunge or forward lunge while keeping tension on the band.
How to Structure a Resistance Band Leg Workout
You can’t just slap on a band and do random reps. To see results, you need structure.
You should always start with a warm-up. At least 5 to 10 minutes. After that you can follow this structure:
- Banded Squats – 3 sets of 15
- Glute Bridges – 3 sets of 12 with pause at the top
- Lateral Band Walks – 2 sets of 10 steps each direction
- Kickbacks – 3 sets of 12 each leg
- Resistance Band Deadlifts – 3 sets of 10
- Step-Out Lunges – 2 sets of 8 each side
Rest 30 to 60 seconds between sets. Keep the tempo controlled. Don’t just race through the reps. This way resistance band exercises for toning legs will start paying dividends.
Try these exercises at our South Congaree gym (3-day free pass available on the page).
Final Thoughts
Resistance bands aren’t a downgrade, they’re a smart way to train. If you want stronger, more toned legs without hammering your joints or needing a gym full of equipment, this is your go-to. The key is being intentional: choose the right bands, follow a solid structure, and push yourself with the right movements. Stick with it, stay consistent, and you’ll see real results.