The best bodyweight exercises for wrestling are the ones that train the positions you actually fight from: pushing an opponent off you, pulling and controlling a single leg, staying strong on one leg, exploding to your feet, and bracing your neck and core under load. The ten below cover all of it, need no equipment, and work whether you train at home or alongside the gym.
Key Takeaways
- Bodyweight work is a foundation and a complement, not a replacement for weights. Lean on it when you cannot reach a gym, during the season, and to build work capacity.
- Choose movements for their transfer to the mat, not for looks. Single-leg strength, explosive hip drive, and a braced neck matter more than isolation.
- Grip and neck are the most wrestling-specific qualities and the easiest to skip. Train them on purpose.
- Program 2 to 3 short sessions a week around mat time, not on top of a hard live practice. Recovery is where the strength shows up.
- Scale every movement. Start with regressed versions (box pistols, incline push-ups), then add explosiveness or reps under fatigue to mimic late-match conditions.
- Neck bridges build resilience but need careful progression. Beginners and youth wrestlers should start with gentle isometrics.
- Everything here needs only your bodyweight, so the full routine travels to a hotel room or a living room.
Why calisthenics works for wrestling
Calisthenics for wrestling works because wrestling is a bodyweight sport in the first place. Every match is a fight to move, control, and resist another person’s weight, and bodyweight training rehearses that directly: it builds relative strength (strength for your size), balance on one limb, and the ability to generate force in more than one straight line. That is the real edge over machine work, which loads one predictable path while the mat never gives you one. The honest limit is maximum strength. Once high-rep push-ups and pull-ups feel easy, added load will push your top-end strength further than bodyweight alone can. Most wrestlers use both, and the same principles carry across combat sports, as they do in these bodyweight exercises for boxers.
What wrestling demands from your body
Before the exercises, it helps to know what you are training for. Wrestling leans on a specific set of qualities, and each exercise below maps to one or more of them:
- Grip and forearms: controlling ties, wrists, and legs.
- Neck and traps: resisting when an opponent works your head, and staying safe under pressure.
- Core and trunk: transferring force between hips and hands and keeping your posture.
- Single-leg strength and hips: shooting, sprawling, changing levels, and driving through finishes.
- Pushing and pulling power: breaking clinches, pummeling, and reeling a leg in tight.
- Explosiveness and conditioning: scoring in bursts and lasting into the final period.
1. Push-ups
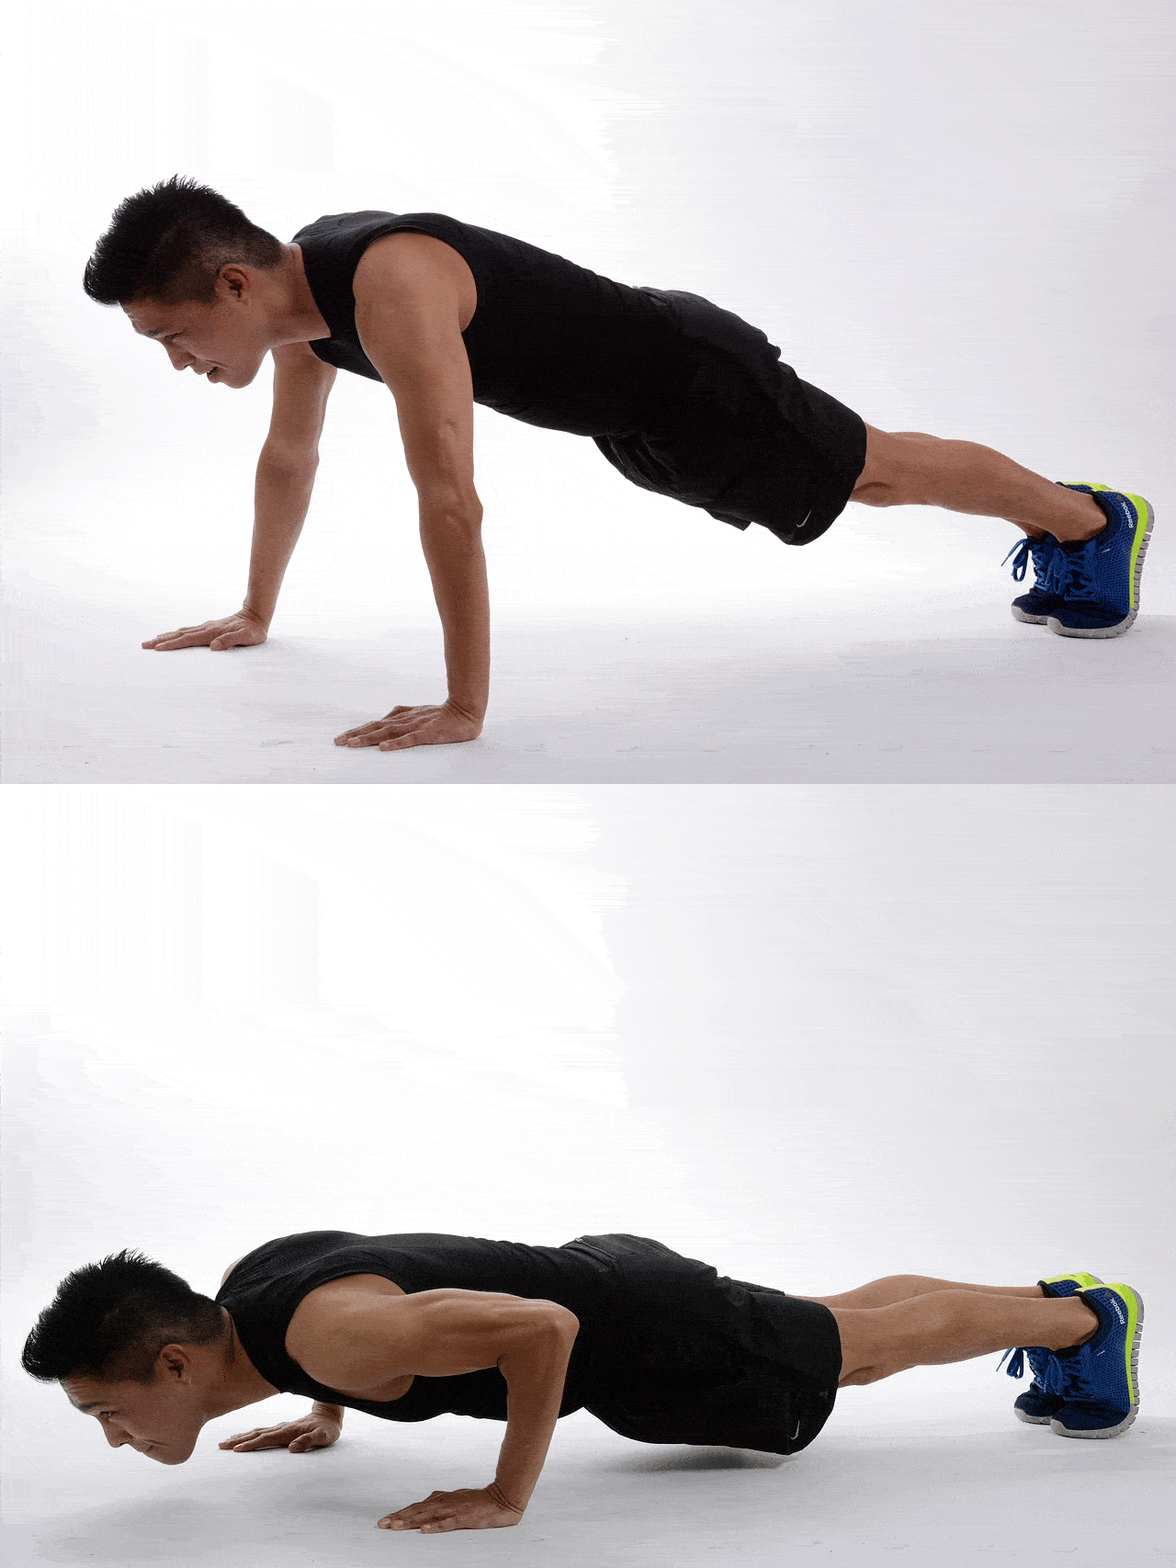
The push-up is the base of upper-body pressing strength, the same drive you use to post on an opponent and push off in a scramble.
- Why it transfers: it strengthens the chest, shoulders, and triceps used in hand-fighting, collar ties, and driving through pressure.
- How to program it: 3 to 4 sets close to failure, 2 to 3 times a week.
- Scale it: incline or knee push-ups to start, then standard, then explosive (clap) push-ups for speed and archer push-ups to load one side at a time.
2. Pull-ups
If wrestling has one signature action, it is pulling, and the pull-up builds the back, arms, and grip behind it.
- Why it transfers: it develops the lats, biceps, and forearms you use to reel in a single leg, cinch a cradle, and control the collar tie.
- How to program it: 3 to 5 sets of strict reps, stopping a rep or two short of failure.
- Scale it: band-assisted or slow lowering reps first, then strict pull-ups, then towel pull-ups to build serious grip and forearm strength. Finish with high-rep sets under fatigue to copy how your grip feels late in a match.
3. Dips
Dips train the exact pushing arc your arms travel when you break a clinch or drive a hand into someone’s chest. Lean your torso forward about 30 to 45 degrees to shift the work onto the chest and front shoulders.
- Why it transfers: the forward-lean dip mirrors driving an opponent off you in the clinch or off a sprawl, and builds strength and mobility in the pecs and triceps at once.
- How to program it: 3 to 4 sets of 7 to 15 reps, twice a week, with full range on every rep.
- Scale it: bench or chair dips first, then full parallel-bar dips, then add a loaded backpack. Not sure which version fits you? Here is how parallel bar dips compare to bench dips.
4. Pike and handstand push-ups
Wrestling lives in overhead positions, from the collar tie to reaching on a shot, and the pike push-up is an upside-down press that builds strength there with no weight.
- Why it transfers: it strengthens the shoulders and triceps that stabilize and drive in every overhead tie, reach, and finish.
- How to program it: 3 to 4 sets of 6 to 10 reps, once or twice a week.
- Scale it: pike push-ups with feet on the floor, then feet elevated on a box for more range, then wall-supported handstand push-ups.
5. Pistol squats
Wrestling is almost always fought on one leg, whether you are in your stance, changing levels, or defending a shot with your leg in the air. The pistol squat builds single-leg strength and the mobility to use it.
- Why it transfers: it strengthens each leg on its own and improves ankle and hip mobility, so you can drop into a deep, stable position and drive back out of it.
- How to program it: 3 sets of 3 to 6 reps per leg.
- Scale it: hold a post or squat to a box first, then full pistol squats, then add a jump at the top for single-leg power.
6. Sprawls
The sprawl is the bodyweight movement that looks most like wrestling, because it is wrestling: dropping your hips hard to stuff a shot, then recovering to your feet.
- Why it transfers: it trains the reactive hip drop that defends takedowns and conditions the hips and core to keep moving under fatigue.
- How to program it: intervals work best, for example 4 to 6 rounds of 20 to 30 seconds of continuous sprawls.
- Scale it: slow, deliberate sprawls to learn the shape, then fast reactive sprawls, then sprawl-to-sprint or sprawl-to-jump to add recovery speed.
7. Bear crawls
Bear crawls build low, multi-directional strength and coordination, the same low-to-the-ground movement you use to scramble and create space.
- Why it transfers: they train the shoulders, core, and hips to work together while you move, which is exactly what a scramble demands.
- How to program it: 3 to 4 sets of 20 to 40 feet, mixing forward, backward, and lateral crawls.
- Scale it: short forward crawls first, then add direction changes, then drag a plate or sled for resistance.
8. Tuck jumps
Explosive hip extension is what gets you to your feet fast, and the tuck jump trains it directly.
- Why it transfers: it develops the rapid hip and knee drive behind the stand-up, the scramble, and finishing through a takedown.
- How to program it: 4 to 6 sets of 3 to 5 crisp reps with full recovery between sets, so each jump stays explosive.
- Scale it: squat jumps first, then tuck jumps, then knee-to-tuck jumps that start from your knees to rehearse a two-position scramble.
9. Neck bridges
A strong neck is one of the biggest differences between wrestlers and other athletes, both for control and for staying healthy.
- Why it transfers: neck strength lets you resist when an opponent works your head on bottom or in a scramble, and lowers the risk of common neck injuries.
- How to program it: start with short front and back holds and add time gradually as the muscles adapt.
- Scale it (read this first): beginners and youth wrestlers should not jump straight to full bridges. Begin with light neck isometrics, pressing gently into your own hand in each direction, then progress to supported bridges, and only later to full bridges. For a full progression, see these bodyweight neck exercises for fighters.
10. Hollow-body hold
Your core is the link that transfers power between your legs and your hands, and the hollow-body hold trains it to stay braced under load.
- Why it transfers: a braced trunk moves force from your hips to your grip and resists an opponent trying to break your posture in a scramble.
- How to program it: 3 to 4 holds of 20 to 40 seconds.
- Scale it: bent-knee hollow holds first, then straight legs, then plank-to-hollow transitions for a bigger challenge.
A no-equipment wrestling routine you can do at home
Here is how to turn the ten movements into a plan that needs nothing but floor space and a bar or ledge to hang from. Run it 2 to 3 times a week on days you are not doing a hard live practice, and keep the explosive work fresh by resting fully between those sets.
- Prime (5 minutes): light movement and a few slow sprawls to warm the hips.
- Strength (3 to 4 sets each): push-ups, pull-ups, dips, and pistol squats, moving between them to save time.
- Power (full recovery between sets): tuck jumps, then pike or handstand push-ups.
- Wrestling and conditioning: alternate sprawl intervals and bear crawls for 4 to 6 rounds.
- Neck and core (most days): neck isometrics or bridges and a few hollow-body holds.
FAQs
Do wrestlers need to lift weights, or is bodyweight training enough?
Bodyweight training builds real, usable strength and is enough to get strong for wrestling, especially for younger athletes, during the season, or when a gym is not available. For top-end strength in a weight class, adding heavy compound lifts on top will take you further, because external load lets you keep progressing once bodyweight reps get easy. Most wrestlers combine all three: the mat for skill, bodyweight work for conditioning and access, and weights for peak strength. If you are deciding where to put your time, weigh the trade-offs between calisthenics and weights.
Can bodyweight training build a wrestler’s physique?
Yes, within limits. High-rep, progressively harder bodyweight work builds the lean, dense muscle across the chest, back, shoulders, arms, and legs that gives wrestlers their compact, functional look. For large gains in size you will eventually need added resistance, because muscle growth depends on progressive overload that pure bodyweight reps struggle to supply past a certain point.
Are these exercises safe for beginner and youth wrestlers?
Most are, as long as you scale them. Push-ups, squats, crawls, and core holds suit any level once you regress the difficulty. The two to introduce with care are neck bridges and high jumps: new or young wrestlers should start with gentle neck isometrics and low, controlled jumps, then add range and intensity only as strength and control improve. Stop any movement that causes joint pain rather than normal muscle fatigue.
Final thoughts
Pick the movements you can do with clean form today, scale the rest, and train them consistently around your time on the mat. Strength that shows up in a match is built from steady work across all of these, not from any single exercise.